demonstração pública sem download nem serial
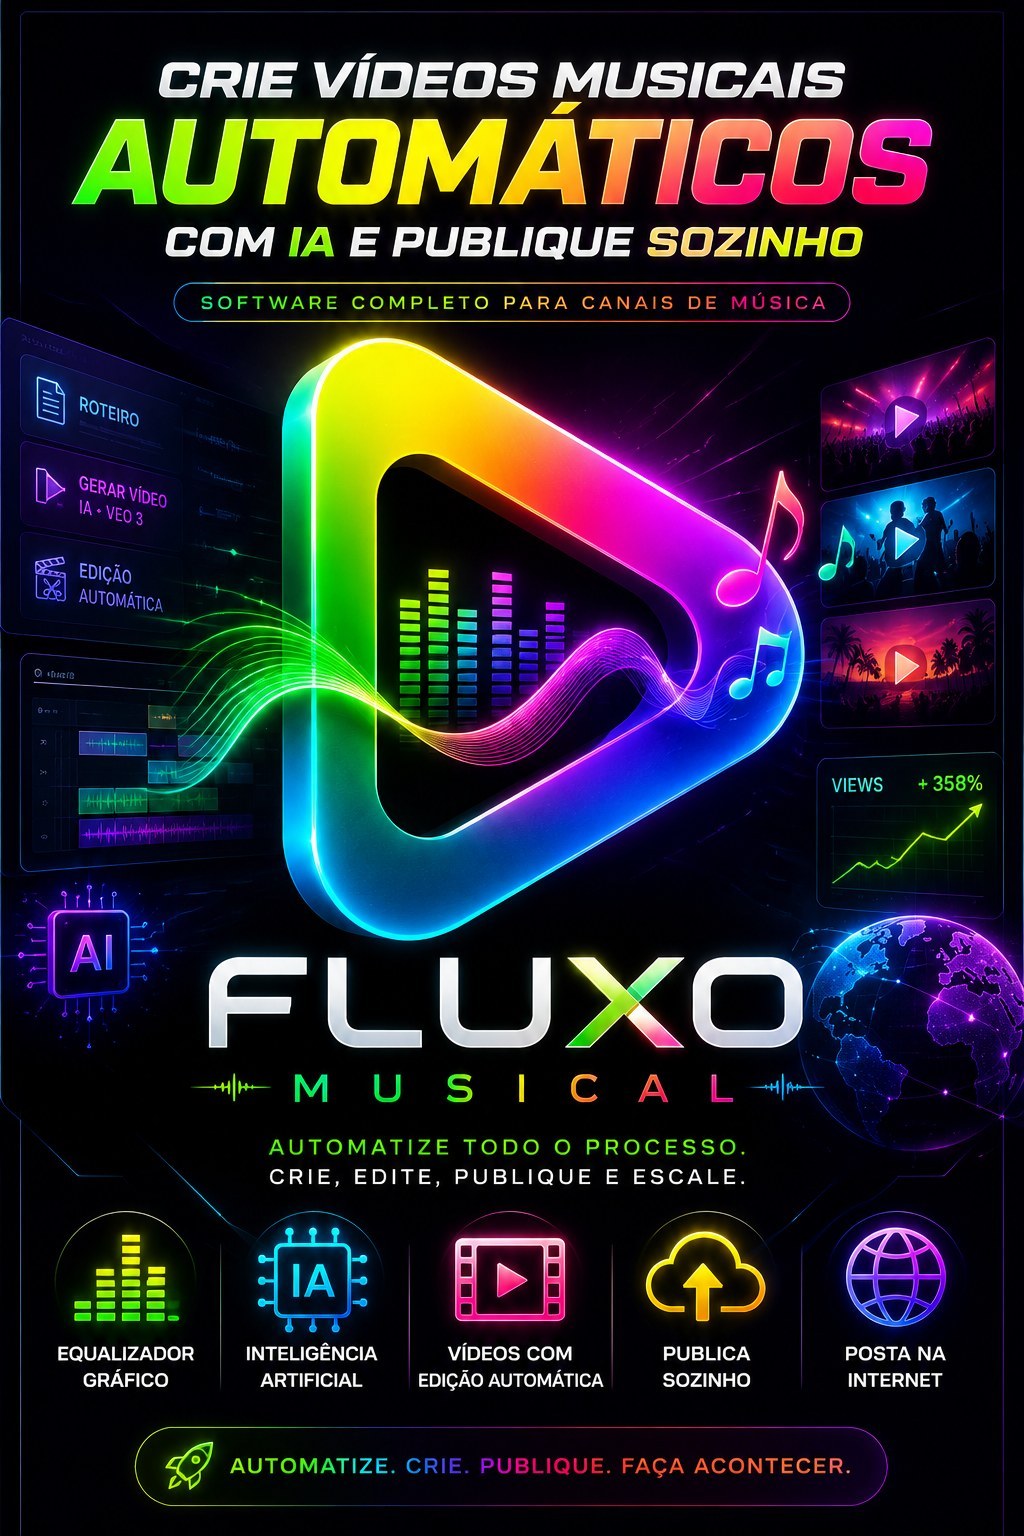
Fluxo Musical Editor visual para canal dark de musicas
Fluxo Musical — vídeos musicais prontos para o YouTube Ferramenta que transforma música em vídeo publicável. Você traz suas próprias músicas ou deixa a IA compor tudo. Ela mistura suas imagens e vídeos de fund...
2345visualizações públicas
Vídeodemonstração disponível
3áreas relacionadas
Gostou Desta Ferramenta?
Leve isso para uma oferta mais forte: acesso total, combo com treinamento ou a versao master com janela maior.
Apresentação
Especificações
Compatibilidade
Windows 10/11. Recomendado: Windows 11.
Última atualização20/10/2026 18:54
Versão / download
link atualizado em 20/10/2026
Tipo de acesso públicoSomente apresentação, vídeo e descrição. Download e serial seguem protegidos.
Atalho De Compra
Este espaço pega quem já viu a apresentação e está pronto para avançar.
O Que Essa Ferramenta Faz
Fluxo Musical — vídeos musicais prontos para o YouTube
Ferramenta que transforma música em vídeo publicável. Você traz suas próprias músicas ou deixa a IA compor tudo. Ela mistura suas imagens e vídeos de fundo, corta, aplica efeitos, escreve as legendas cantadas, monta a capa, gera o SEO e — se você quiser — publica sozinha no seu canal do YouTube, já agendada. Tudo em lote, um vídeo diferente do outro.
O que sai pronto na pasta de saída
- Vídeo final .mp4 — 720p, 1080p, 1440p, 4K ou vertical 9:16
- <vídeo>_SEO.txt — título, descrição, tags e capítulos com o tempo de cada música
- <vídeo>_LETRA.txt — a letra, quando a música foi gerada por IA
- Capa (thumbnail) em 16:9, com ou sem texto — você escolhe
- Legendas sincronizadas já queimadas no vídeo
Por que ele é diferente
- Um projeto por canal. Cada canal guarda as próprias músicas, pastas, ajustes, capa, SEO e conta do YouTube. Trocar de canal é escolher o projeto na caixa do topo — nada pra reconfigurar.
- Publica sozinho. Terminou de gravar, ele envia pro canal certo e agenda a data e a hora dentro do YouTube. Você não precisa deixar o programa aberto até a hora de publicar.
- Pastas monitoradas. Aponte suas pastas de imagem e vídeo uma vez; material novo entra sozinho na próxima geração.
- Nunca repete. Cada vídeo sorteia uma combinação inédita e pica os vídeos em trechos curtos.
- Lote de verdade. Peça 1, 10 ou 50 vídeos e acompanhe pela fila. Se faltar energia ou você fechar no meio, ele retoma de onde parou.
- Dois formatos. Playlist longa (1 hora, 3 horas) ou um vídeo por música.
- Funciona sem nenhuma chave paga se você usar suas músicas, suas pastas de imagem e as legendas no modo local.
Download e acesso
Instalação e primeiro uso
- Baixe o arquivo. Se for o .zip, descompacte a pasta inteira antes de clicar em qualquer coisa — arrastar só o programa pra fora não funciona. Se for o instalador, é só avançar: ele instala sem pedir senha de administrador e cria o atalho.
- Abra o Fluxo Musical. Não precisa instalar mais nada: já vem tudo dentro.
- Entre com o e-mail e a senha da sua conta — a mesma da plataforma. Não existe serial; o acesso é conferido a cada abertura, então você precisa de internet pra entrar.
- A ferramenta abre no seu navegador, no endereço do seu próprio computador. É normal: ela roda na sua máquina.
- A versão instalada aparece no topo, ao lado do nome. É o primeiro dado que o suporte pede.
- Pra fechar de verdade, use o botão ⏻ no canto superior direito. Fechar só a aba do navegador deixa o programa rodando por trás.
Os botões do topo
- Editor e Pipeline Mágico — os dois caminhos de trabalho.
- Caixa de projeto e ? — troca de canal e gerencia os projetos.
- Fila — abre a lista do que está sendo gravado.
- ? — abre este tutorial dentro do programa.
- ! — Relatar problema: salva um arquivo de diagnóstico na sua Área de Trabalho pra você mandar pro suporte.
- ⚙ — Configurações.
- ⏻ — encerra o programa.
- Bandeiras — a interface inteira em português, inglês, espanhol, francês, alemão e japonês.
Projetos — um canal, um projeto
Este é o recurso que muda a rotina de quem toca mais de um canal. Cada projeto guarda tudo: as músicas da lista, as pastas de mídia, a resolução, os efeitos, o texto da capa, o prompt do SEO, a pasta de saída e o canal do YouTube que recebe os vídeos.
- Trocar de canal: escolha o projeto na caixa do topo. A tela inteira troca junto. Se a troca não completar por algum motivo, a caixa volta sozinha pro projeto que está no ar — ela nunca mostra um canal que não está aberto.
- Botão ?: criar, renomear, excluir e salvar. A lista mostra quantas músicas e mídias cada projeto tem, quando foi alterado e em qual canal ele publica.
- Projeto novo já nasce configurado: ele copia os seus ajustes atuais e começa só com as pastas em branco, pra não herdar as imagens do canal anterior.
- Salva sozinho enquanto você mexe. Excluir um projeto não apaga nenhuma música ou imagem do seu computador.
Caminho 1 — Pipeline Mágico (o mais fácil)
Pra quem está começando: um prompt e ele faz tudo — compõe as músicas, busca as imagens, grava os vídeos e ainda publica, se o envio estiver ligado.
- Clique na aba Pipeline Mágico, no topo.
- Escreva o prompt universal do canal — o que o canal é, não uma música só.
Ex.: lo-fi noturno pra estudar, piano suave e chuva, clima de quarto à noite
Ex.: sertanejo raiz de sofrência com viola, estrada de terra e boteco
Ex.: 528 Hz de cura e meditação profunda - Escolha quantas músicas, o idioma e se é instrumental.
- Em Resultado, escolha 1 vídeo por música ou Playlist única.
- Em De onde vem a imagem dos vídeos, ligue as fontes: Stock, KIE, Meta AI ou Minhas pastas. Ligue pelo menos uma.
- Clique em Criar tudo automaticamente e acompanhe pela Fila.
O Pipeline Mágico reaproveita os ajustes do Editor: resolução, efeitos, visualizador, capa, SEO e canal do YouTube. Configure o Editor uma vez e o resto vira rotina.
Caminho 2 — Editor (com as suas músicas)
- Coluna 1 — Músicas. Clique em Pasta ou + Arquivos, ou arraste os MP3 pra tela. O botão ? monitora uma pasta (música nova entra sozinha) e o ⇄ embaralha a ordem. Evitar repetir música sorteia primeiro o que nunca virou vídeo; Liberar todas zera esse controle.
- Coluna 2 — Imagem e efeitos. Clique em + Pasta monitorada e aponte suas pastas de imagem e vídeo. Ligue o interruptor de Fontes de Mídia e ligue cada pasta que deve entrar. O peso define o quanto cada pasta aparece.
- Escolha o modo do fundo: Randomizar tudo, Fundo dinâmico (troca de cena o tempo todo) ou Um vídeo por mídia.
- Coluna 3 — Extras. Ligue o que quiser: SEO, publicação no YouTube, capa, texto no vídeo, legendas, visualizador de áudio e logo do canal.
- Barra inferior. Defina tipo de vídeo, codec, resolução, FPS, duração máxima, pasta de saída, nome do arquivo e quantidade de vídeos.
- Clique em GERAR. Cada vídeo vira um item na Fila de Renderização.
Publicar no YouTube sozinho
No card Publicar no YouTube (coluna Extras). Cada projeto publica no seu canal — o vídeo do canal de sertanejo nunca vai parar no canal de lo-fi.
Ligar a conta (uma vez por conta)
- Em Conta do Google, clique em + pra cadastrar a conta e dê um nome a ela.
- Clique em Entrar nesta conta. Abre uma janela normal do Chrome: quem digita o e-mail e a senha é você, como em qualquer login. O programa nunca pede nem guarda a sua senha do Google.
- Clique em Procurar meus canais e escolha, em Canal que recebe os vídeos, o canal deste projeto. Contas com vários canais aparecem todas na lista.
Como publicar
São as perguntas que o YouTube faz em todo vídeo, respondidas uma vez só:
- Público do vídeo — conteúdo para crianças ou não.
- Feito com inteligência artificial — declarar, não declarar, ou deixar como o YouTube marcar.
- Anúncios no vídeo — ligados (canal monetizado) ou desligados.
- Quem pode ver — público, não listado ou privado.
- Playlist do canal — opcional, e ele cria a playlist se ela ainda não existir.
- Local de gravação — opcional.
- Tela final e cartões — quantos cartões e a partir de que segundo.
Quando publicar
O agendamento é feito dentro do YouTube. Ou seja: depois que o vídeo sobe, ele publica na data marcada mesmo com o seu computador desligado.
- Vários por dia, espaçados — quantos por dia, a que horas começa e de quantas em quantas horas.
- Um por dia, no mesmo horário — hora e minuto fixos.
- Em dias certos da semana — você marca os dias.
- Começar a publicar no dia — a data em que a agenda começa.
Acompanhar os envios
- Enviar os vídeos que já estão prontos — coloca na fila do canal o que já foi gravado antes.
- Ver envios — a lista com tudo que subiu, o que está subindo e o que falhou. Dá pra começar, pausar e mandar tentar de novo.
- Aviso no próprio card do vídeo — quando o envio falha, o card fica laranja com o motivo em linguagem simples e um botão Tentar enviar de novo. Vídeo publicado mostra o link ver no canal. Vídeo gravado que não chegou a entrar na fila também avisa, em vez de ficar verde como se estivesse tudo certo.
- Marca no nome do arquivo — o que já subiu ganha
___upload_ok no fim do nome. É assim que você bate o olho na pasta e sabe o que já foi publicado, e é assim que ele nunca sobe o mesmo vídeo duas vezes.
- Limite diário do canal — quando o YouTube barra o canal por excesso de envios no dia, o programa avisa e retoma depois, sem perder a fila.
___upload_ok no fim do nome. É assim que você bate o olho na pasta e sabe o que já foi publicado, e é assim que ele nunca sobe o mesmo vídeo duas vezes.Fila de renderização
- Cada vídeo vira um card com a etapa atual e o tempo estimado. Dá pra marcar todos, cancelar marcados, remover marcados, limpar concluídos e fechar a fila.
- Retoma sozinho. Se acabar a energia ou você encerrar no meio, na próxima abertura o que ficou pela metade volta pra fila.
- Uma cópia só manda na fila. Se você abrir o programa duas vezes, ele avisa — duas cópias gravando ao mesmo tempo corrompem o vídeo.
- Velocidade da fila (em Configurações): o programa mede o seu computador e decide quantos vídeos gravar ao mesmo tempo. Dá pra fixar em 1, 2 ou 3.
Guia rápido dos recursos
Fontes de mídia
- Modo automático — a ferramenta calcula quanta mídia o vídeo precisa, pesquisa, baixa e mistura sozinha.
- Stock automático — Pixabay e Pexels, cenas ligadas ao tema do canal (precisa das chaves gratuitas).
- IA paga (KIE AI) — imagens e vídeos exclusivos, gerados na hora.
- Meta AI / vibes — geração gratuita usando as suas próprias contas, cadastradas em Configurações. É um recurso beta: se o site mudar, ele pode falhar por uns dias, então mantenha sempre uma segunda fonte ligada.
- Minhas pastas — suas pastas monitoradas, cada uma com um peso que define o quanto ela aparece.
- Mídias avulsas — o que você arrastou direto pra tela.
- Mídias por vídeo — quantas cenas entram em cada vídeo. Mais mídia = menos repetição.
- ↻ revarre as pastas na hora, quando você acabou de copiar arquivos novos.
Efeitos de imagem
- Movimento sutil — zoom, pan e drift lentos; tira o ar de slide parado.
- Partículas — espaço ou poeira por cima da cena.
- Picotar vídeos — corta os vídeos longos em pedaços de mín a máx segundos. O padrão 2 a 4 segundos dá o ritmo de clipe.
- Duração de cada imagem — quanto tempo uma foto fica na tela no fundo dinâmico (padrão 8 segundos).
Capa (thumbnail)
A frase da capa é desenhada pelo programa, não pela IA de imagem — por isso ela sempre sai legível, sem letra torta ou palavra inventada.
- Imagem de fundo: mídia do próprio projeto, um quadro do próprio vídeo, a sua pasta de fundos, geração por IA (KIE ou OpenRouter) ou capa pronta pelo ChatGPT.
- Capa pelo ChatGPT — você conecta a sua conta do ChatGPT uma vez (login feito por você, na janela do navegador) e ele desenha a capa já com a frase. O card mostra se a conexão está de pé, verificada na hora.
- Legenda automática — a IA escreve a chamada com base no tema do canal.
- Escrever eu mesmo — você define tema, chamada, selo e a palavra que sai colorida.
- Sem texto — a imagem sai exatamente como está. Use quando suas fotos já vêm com o texto pronto, pra não ficar texto sobre texto.
- Ainda dá pra escolher onde fica a legenda (nove posições), o estilo, a fonte, a cor de destaque, a cor do texto e a faixa escura por trás.
- Testar capa mostra o resultado antes de gerar o vídeo inteiro.
Legendas automáticas
- Ligue o interruptor no card Legendas Automáticas: ele transcreve a letra cantada e queima a legenda no vídeo.
- Motor, idioma, palavras por linha, estilo, cor, tamanho e posição ficam em Configurações → Legendas da música.
- AssemblyAI (recomendado) é liberado pela sua conta e é rápido.
- Local / offline não precisa de chave nem de internet. Na primeira vez ele baixa o modelo, então demora mais; depois fica no seu computador. Dá pra escolher entre modelo mais rápido e modelo mais preciso.
- Funciona também em japonês, coreano, chinês, árabe, hindi, turco, russo, polonês e holandês, além dos idiomas ocidentais.
- Música muito instrumental ou com voz baixa rende poucas linhas — é limite da transcrição, não erro da ferramenta.
Música por IA
- No card Gerar músicas com IA: você escreve o prompt e ele inventa letra, título e voz.
- Escolha o idioma (automático pelo prompt, português, inglês, espanhol, francês, italiano, alemão ou sueco), quantas versões e se é instrumental.
- A letra sai num arquivo _LETRA.txt ao lado do vídeo.
SEO e capítulos
Com o card SEO / Otimização ligado, sai um <vídeo>_SEO.txt ao lado do vídeo com título, descrição, tags e os capítulos já com o tempo de cada música — é só copiar e colar no YouTube. Quando o envio automático está ligado, ele mesmo já usa esse SEO na hora de publicar.
- Sobre o que são seus vídeos — quanto mais detalhe, melhor a otimização.
- Idioma da otimização — o SEO sai no idioma do seu público, não no seu.
- Testar otimização — mostra o resultado antes de gravar o lote.
- Usar o título do vídeo como nome do arquivo — o arquivo sai com o nome do título, em vez de "output (3)".
Extras visuais
- Vídeo Overlay — botão "inscreva-se" em português ou inglês, ou o seu próprio arquivo com transparência, repetindo no intervalo que você definir. Tem remoção de fundo verde pra quem usa animação com chroma key.
- Imagens Temporais — imagens que aparecem com transição suave em momentos certos (ex.: "Ouça no Spotify" no começo), com tamanho, início, duração e repetição.
- Visualizador de Áudio — barras, ondas, linha, espectro, central ou sorteado por vídeo; com largura, altura, posição, opacidade e cor.
- Logo do Canal — sua marca num canto, com tamanho e opacidade, e a opção de pulsar na batida da música.
- Texto no Vídeo — uma frase fixa com fonte, tamanho, cor, contorno e sombra, que aparece a partir de certo momento e volta de tempos em tempos.
Saída do vídeo
- Tipo: playlist (vídeo longo com várias músicas) ou um vídeo por música.
- Codec: H.264 (recomendado, aceito em tudo) ou H.265 (arquivo menor).
- Resolução: 720p, 1080p, 1440p, 4K ou vertical 9:16 pra Shorts.
- FPS e duração máxima em minutos.
- Tocar a última música até o fim — em vez de cortar a faixa no meio quando bate a duração pedida, o vídeo passa um pouco e termina junto com a música.
- Pasta de saída, nome do arquivo e quantidade de vídeos do lote.
Configurações
- Painel de APIs — mostra quais chaves a sua conta liberou; o botão Atualizar chaves do painel puxa o que você acabou de cadastrar.
- Velocidade da fila — quantos vídeos gravar ao mesmo tempo.
- Legendas da música — motor, modelo, idioma, palavras por linha, estilo, fonte, cores, tamanho e margem.
- Geração de mídia (KIE AI) — modelo de imagem e modelo de vídeo.
- Mídias Stock — provedor preferido, Pixabay ou Pexels.
- Meta AI — cadastro das suas contas para a geração gratuita.
- Espaço no disco — mostra quanto o programa está ocupando e libera o que é descartável com um clique.
- Relatar problema — salva o arquivo de diagnóstico na Área de Trabalho, copia o relatório ou abre a pasta.
- Licença e Sair — a conta que está usando o programa.
Chaves de API necessárias
As chaves não são cadastradas dentro do programa — elas ficam no seu painel, e o Fluxo Musical lê o que a sua conta liberou toda vez que abre. Dependendo do seu plano, algumas já vêm liberadas e você não precisa cadastrar nada.
Cadastrou ou trocou uma chave com o programa aberto? Feche e abra o Fluxo Musical de novo — as chaves são lidas na abertura. Ou clique em Configurações → Atualizar chaves do painel.
Nenhuma chave é obrigatória pra ferramenta funcionar. Cada uma liga uma parte da automação:
Suno — músicas por IA (opcional, paga)
- Serve para: compor as músicas (letra, voz, estilo) e para o Pipeline Mágico. Se você já tem suas músicas, pule.
- Criar a chave: sunoapi.org
- Vídeo tutorial: assistir
- Cadastrar no painel: cadastrar chave Suno
OpenAI — títulos, descrição, tags e capítulos (opcional, paga)
- Serve para: o SEO, as letras e a frase da capa. É a mais recomendada — rende muito.
- Criar a chave: platform.openai.com
- Vídeo tutorial: assistir
- Cadastrar no painel: cadastrar chave OpenAI
OpenRouter — alternativa de texto e capa por IA (opcional)
- Serve para: plano B do SEO e geração da imagem de fundo da capa.
- Criar a chave: openrouter.ai
- Vídeo tutorial: assistir
- Cadastrar no painel: cadastrar chave OpenRouter
AssemblyAI — legendas da música (opcional, tem plano gratuito)
- Serve para: transcrever a letra cantada e gerar as legendas. Sem ela existe o modo local, que não precisa de chave nem de internet.
- Criar a chave: assemblyai.com
- Vídeo tutorial: assistir
- Cadastrar no painel: cadastrar chave AssemblyAI
Pexels — mídias de fundo (opcional, gratuita)
- Serve para: o Stock automático.
- Criar a chave: pexels.com/api
- Vídeo tutorial: assistir
- Cadastrar no painel: cadastrar chave Pexels
Pixabay — mídias de fundo (opcional, gratuita)
- Serve para: o Stock automático.
- Criar a chave: pixabay.com/api
- Vídeo tutorial: assistir
- Cadastrar no painel: cadastrar chave Pixabay
KIE AI — imagens e vídeos por IA (opcional, paga)
- Serve para: gerar cenas exclusivas e fundo de capa. Sem ela, use suas pastas, o Stock automático ou o Meta AI.
- Criar a chave: kie.ai
- Vídeo tutorial: sem vídeo
- Cadastrar no painel: cadastrar chave KIE AI
Quer gastar zero? Use suas próprias músicas + suas pastas de imagens e vídeos + legendas no modo local. Nesse caminho a ferramenta funciona sem nenhuma chave paga, e a publicação no YouTube continua funcionando normalmente.
Requisitos e limites
- Windows 10 ou 11, cerca de 2 GB livres em disco (mais o espaço dos vídeos que você gerar).
- Internet pra entrar na conta, pra publicar no YouTube e pras partes que usam IA. A gravação em si roda no seu computador.
- Placa de vídeo NVIDIA acelera bastante a gravação, mas não é obrigatória.
- Pra publicar, o Google Chrome é usado pra abrir o login do seu canal. Se ele atualizar, o programa se ajusta sozinho.
- O YouTube tem limite de envios por dia por canal — o programa respeita e continua no dia seguinte.
- O Meta AI é um recurso beta e gratuito: pode falhar quando o site muda. Mantenha outra fonte de mídia ligada.
Problemas comuns
- Não consigo entrar. O acesso é conferido a cada abertura: confira a internet e se o seu plano está ativo. Não existe modo offline.
- O vídeo saiu preto. Nenhuma mídia entrou na mistura. Confira se o interruptor de Fontes de Mídia está ligado, se a pasta está marcada e se ela tem arquivos válidos. Clique em ↻ pra revarrer e gere de novo.
- A legenda não aparece. Veja se o card Legendas Automáticas está ligado e se o motor escolhido está pronto. Sem AssemblyAI, troque pra Local / offline.
- Texto em cima de texto na capa. Suas imagens já têm texto: escolha Sem texto.
- "Chave não encontrada". Cadastre a chave no painel e clique em Atualizar chaves do painel — ou feche e abra o programa.
- O vídeo não subiu pro YouTube. O card do vídeo mostra o motivo em português e o botão Tentar enviar de novo. Os motivos mais comuns são a conta ter deslogado (basta entrar de novo em Entrar nesta conta) e o limite diário do canal.
- Subiu no canal errado. Cada projeto tem o seu canal: confira Canal que recebe os vídeos no projeto certo.
- Corte rápido demais ou lento demais. Ajuste
Novidades das versões 1.5.145 a 1.5.147
Ouvir a música na lista
Cada música da lista tem um botão de tocar ao lado do nome. Clique para ouvir e saber qual arquivo é qual música. Clique de novo para pausar. Ao clicar em outra música, a anterior para.
Vídeo excluído da fila de envio não volta sozinho
O vídeo que você exclui da fila de envio não reaparece quando você fecha e abre o programa, mesmo continuando na pasta de saída. Se quiser que ele volte a contar como pronto, a aba de envio mostra quantos você excluiu e tem o botão Trazer de volta.
Pastas monitoradas à vista
Embaixo da área de soltar músicas aparecem as pastas que o programa está acompanhando (música nova delas entra sozinha na lista). Cada uma tem o botão Parar: a pasta deixa de ser acompanhada e as músicas que já estão na lista continuam.
A música que você tira da lista não volta mais pela pasta monitorada. Quando você limpa a lista inteira, o programa esquece as pastas antigas.
Cada canal usa só as músicas que pediu
No piloto automático, a música nova que o programa gera para um canal fica marcada como daquele canal. Os outros canais não usam essas músicas, mesmo quando todos guardam as músicas na mesma pasta.
Gerador de música fora do ar não trava os outros canais
Se o Treblo ou o AceMusic falhar três músicas seguidas, o programa para aquele pedido e segue com os outros canais, em vez de tentar por horas. O pedido também não é repetido sozinho quando o site está fora.
Novidades da versão 1.5.148
Mais opções do Suno
Quem gera músicas pelo Suno com a própria conta agora ajusta as mesmas opções do site do Suno, sem sair do programa. Abra a aba Gerar músicas, escolha Suno (sua conta) e clique em Mais opções do Suno.
- Excluir estilos: escreva o que não quer ouvir na música, por exemplo coral, saxofone ou autotune.
- Gênero da voz: Auto (o Suno escolhe), Masculina ou Feminina.
- Duração: deixe em Auto ou escolha o tempo da música, de 10 segundos a 6 minutos.
- Modo máximo: liga o modo de mais qualidade do Suno.
- Estranheza: quanto mais alta, mais ousado e diferente sai o resultado.
- Influência do estilo: quanto mais alta, mais a música segue à risca o estilo que você escreveu.
- Variedade: de Baixa a Máxima, controla o quanto as músicas variam entre si.
O botão Restaurar padrão volta tudo para o jeito do Suno. As opções valem para músicas com letra ou sem vocal; quando o próprio Suno escreve a letra pelo tema, ele não oferece esses ajustes e o programa avisa no registro de atividades.
Cada projeto guarda as suas opções. Elas valem também no Pipeline Mágico e no Piloto automático quando a música é feita pelo Suno com a sua conta. Se alguma opção não pegar no site, a música sai mesmo assim, com o padrão do Suno nessa opção, e o programa avisa no registro de atividades.
Novidades da versão 1.5.149
Músicas grátis do AceMusic com nome comprido
Quando o nome da música era longo, o AceMusic gerava as faixas mas o programa não conseguia salvar o áudio e mostrava "não consegui baixar o áudio do AceMusic". Agora as faixas são salvas normalmente, qualquer que seja o tamanho do nome.
Quer O Ecossistema Completo?
Depois de ler os detalhes, muita gente prefere já garantir o acesso maior em vez de decidir ferramenta por ferramenta.
Outras Ferramentas Para Mostrar Junto